

Hello my friends! Thank you for joining me for the
MBT "Teach Me Tuesday" Tutorial!
I hope you will enjoy my tutorial on
beaded butterfly embellishments!
Here are the supplies you will need:

~scissors
~glue gun
~butterfly die cut out of felt
~flower stamen
white flat back pearl trim(from the MBT shop)
(2) beaded pearl sprays with three stems each(from the MBT shop)

1.Start off by cutting off 2 of the flat back pearls from the trim.
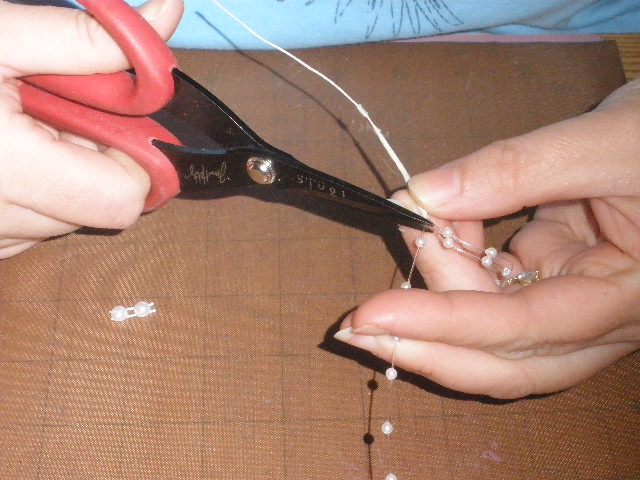
2.Cut off one of the 3 stems as you only need two for the butterfly wings.

3.Then on one of the two remaining stems, cut off one of the beads,
near the top of the next bead.

4.Place a small amount of hot glue at the top of the white stem.

5.Twist one of the stems down and put into hot glue dot onto the stem.

6.Place another drop of hot glue in the same place as above.

7.Repeat the twist step from above.

8.This is how it should look when you are done.

9.Cut off stem near the place where you hot glued the stems.
Repeat steps 2-9 for the other 3 stem spray.

10.This is how it should look when you are done.

11. Take your felt die cut and glue to the center of your pearl butterfly.

12. Glue flat back pearl trim to the center of the felt
butterfly to form the body of the butterfly.

13. Glue the stamens to the back of the butterfly's head
to form the antenae.

14. Here is the final product!! Aren't they cute?

I decided to make a card to put my little
butterfly on as an accent. I think it came out cute!

Here is a closeup of my little butterfly on the card.....
Thanks so much for stopping by and I hope
you enjoyed my tutorial!
Hugs,
Leslie♥
No comments:
Post a Comment